Enabling SSH with Password Authentication on an Ubuntu Server

Hello there! Today, we're going to learn how to enable SSH (Secure Shell) with password authentication on an Ubuntu server. SSH is a protocol that allows you to securely connect to a remote server, much like having a secure conversation over the phone. By default, Ubuntu may have password authentication disabled for security reasons, but there are times when you might need to enable it. Let's walk through the process step by step.
Step 1: Understanding SSH and Its Importance
Before we dive into the technical steps, let's understand what SSH is and why it's important:
- SSH (Secure Shell): Think of SSH as a secure tunnel that allows you to access and manage a remote server over the internet. It's like having a secure line to your server, ensuring that no one can eavesdrop on your conversation.
- Password Authentication: This is one way to authenticate yourself to the server. It's like using a password to unlock your phone. While it's convenient, it's important to use strong passwords to keep your server secure.
Step 2: Accessing Your Ubuntu Server
- Open Your Terminal: To start, you'll need to access your server. Open your terminal on your local machine.
- Connect to Your Server: Use SSH to connect to your server. You'll need the server's IP address and your username.bashCopy codessh username@your-server-ip
Replaceusernamewith your actual username andyour-server-ipwith the server's IP address.
Step 3: Configuring SSH for Password Authentication
- Edit the SSH Configuration File: Once you're connected to your server, you'll need to edit the SSH configuration file. This file is like the control panel for SSH settings.
nano /etc/ssh/sshd_config
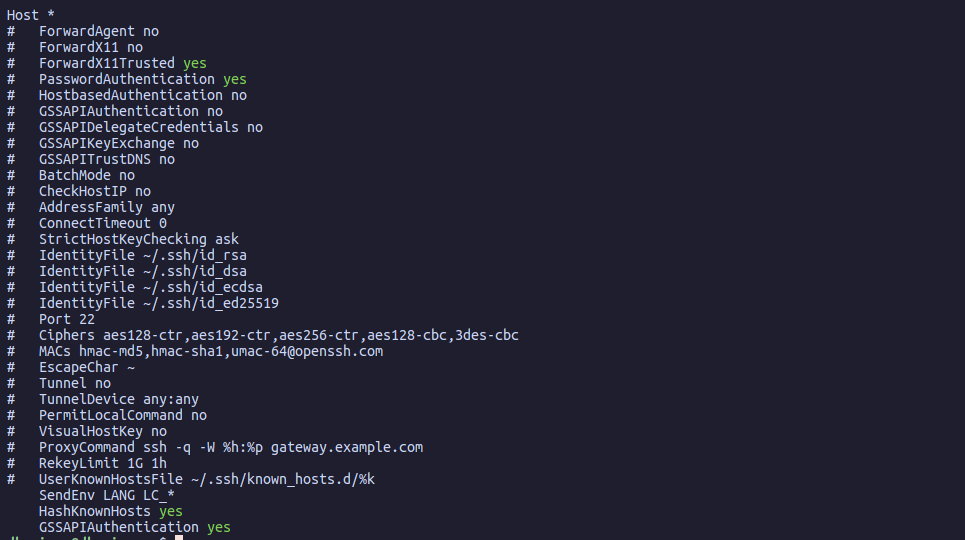
This command opens the SSH configuration file in the Nano text editor. - Find the Password Authentication Setting: Look for the line that says
PasswordAuthentication. It might be commented out with a#at the beginning - Enable Password Authentication: Change the line to enable password authentication by setting it to
yes. Remove the#if it's therePasswordAuthentication yes
This change tells the server to allow password-based logins.
- Save and Exit: Save your changes and exit the editor. In Nano, you can do this by pressing
CTRL + X, thenYto confirm, andEnterto exit.
Step 4: Restart the SSH Service
- Restart SSH: For the changes to take effect, you'll need to restart the SSH service. Think of this as refreshing the settings.
sudo systemctl restart ssh
This command restarts the SSH service, applying your new configuration.
Common Mistakes and Tips
- Strong Passwords: Always use strong, unique passwords for SSH access. This is crucial for keeping your server secure.
- Firewall Settings: Ensure your server's firewall allows SSH connections. You can check this with:bashCopy codesudo ufw allow ssh
- Backup Configuration: Before making changes, consider backing up your SSH configuration file. This way, you can easily revert if something goes wrong.
sudo cp /etc/ssh/sshd_config /etc/ssh/sshd_config.bak - Security Considerations: While password authentication is convenient, consider using SSH keys for enhanced security. SSH keys are like a more secure version of passwords.
Conclusion
Great job! You've successfully enabled SSH with password authentication on your Ubuntu server. Remember, while password authentication is useful, always prioritize security by using strong passwords and considering SSH keys for authentication. As you continue to explore server management, keep practicing and learning. The more you experiment, the more confident you'll become. Happy coding!